Wednesday, December 25, 2013
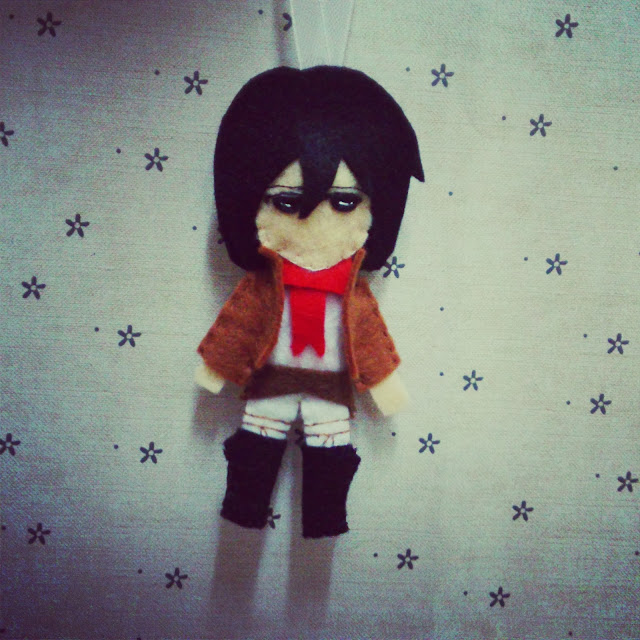
Captain Levi or Rivaille Heichou Mini Plushie
I used 3 hours to make one mini plushie and I really love it. He still looks handsome eventhough it's a plushie.
Monday, December 23, 2013
Hatsune Miku Plushies
Showing off my felt crafts that were for sale during Hobbycon 2013 in Kota Kinabalu recently. All were handmade with love and care.
Sunday, December 15, 2013
Christmas Cottage Ornament Plushie (Christmas 2013 Collab)
MATERIALS:
1. Felts - Red, White, Dark Blue, Light Blue and Green
2. Ribbon
3. Beads
4. Sewing Kit
Slideshow of how I made my ornament: Christmas Cottage filled with warmth and love! Make one and gift it to someone special. Simple yet full of love.
Collabers: (list updated on 16th Dec 2013)
LittleMissPlush - http://youtu.be/OOjBwGldDps
Kawaii Autumn - http://youtu.be/vacRUveDios
HappyFriendsShoppe - http://youtu.be/Cd6hNzw7jxI
B4Astudios - http://youtu.be/swhH4nTOh8I
miss YummyGumGum - http://youtu.be/TJ-HFxtiZ3I
Dreamgirlcrafty -
GotToLoveCreativity - http://youtu.be/FmwYI8tERnk
MissCrafty13 -
Sarah Hamza - http://youtu.be/022MTamSboc
Kuroshi
PastelSakura
MinCraftingIdeas - http://youtu.be/9CiMwG_chZY
Vi Crafts - http://youtu.be/022MTamSboc
JellybeanDoctor -
Harmony Val - http://youtu.be/rt0GAX40VDQ
SkyexSora - http://youtu.be/tlPpNSQ5BNo
StitchLotsOfLove - http://youtu.be/2G6ITRhShDQ
Daysky Sister -
Monday, November 11, 2013
How I Made Adventure Time Finn in Snow Sweater (Plushie)
Finn in Snow
Sweater
Materials:
1.
Felts
a.
White – HEAD x2, GLOVES x2, SOCKS x2, SNOWMAN x1
b.
Black – SHOES x4
c.
Skin – FACE x1, LEGS x2
d.
Light Blue – PANTS x2
e.
Dark Blue – SWEATER x2
f.
Pink – MOUTH x1
g.
Red – TOUNGUE x1
2.
Threads of same colour
a.
EMBROIDERY with WHITE – teeth and snowdrops.
b.
EMBROIDERY with BLACK – snowman’s eyes and
buttons.
3.
Sewing Kit
FRONT PIECE ONLY
Prepare HEAD. Cut
hole on HEAD and attach the FACE inside (looked more realistic than sticking
the face on top of the HEAD piece.)
Prepare SWEATER. Stitch on the SNOWMAN. Embroidery the
snowdrops. Attach the NECK collars and TUMMY pieces behind the SWEATER.
Prepare GLOVES. Stitch them and attach them with the red
SLEEVES.
Prepare PANTS and LEGS.
Attach ALL TOGETHER now. Attach the SLEEVES and PANTS behind
the SWEATER.
Prepare the FACE. Attach MOUTH and TONGUE. Embroidery the
EYES.
Embroidery the SNOWMAN’s eyes and buttons.
BACK PIECE
Attach red NECK collar and TUMMY pieces together.
BOTH PIECES – Stitch them together now, as you stuff along
the way.
Thursday, November 7, 2013
How to Make Berry Plushie (from A Cloudy Chance of Meatballs 2)
How to Make Berry Plushie
(A Cloudy Chance of Meatballs:
Revenge of the Leftovers)
I don’t find strawberries cute, but Berry from this movie
was the most kawaii strawberry I’ve ever encounter. It was sweet and loving,
just like a strawberry should be… haha…
Materials:
1)
Felt – red, green, white, black
2)
Thread – same colors as felt and extra one,
YELLOW
3)
Sewing kit
4)
Ribbon or Key Chain
Template:
1)
Red felt: face x2
2)
Green felt: leaves x2, feet x1 pair, hands x2,
eyes x2
3)
White felt: eyes x2
Place the face and hands together, just check position.
Step1: Use YELLOW thread to sew seed-patterns,
double-thread.
Step2: Sew on the eyes, mouth and hands on the front-piece.
Step3: Sew the leaves and feet on the inside of back-piece.
Create leaf-lines as you sew the hands.
Step4: Backstitch around the Berry.
Stuff it as you stitch.
Step5: Sew-on the ribbon in between the leaves.
Create leaf-lines as you attach the ribbon.
Step6: Attach a keychain if you like.
Happy Plushing!
Facebook Page: Harmony Plushies
Pinterest: harmony plush
Deviantart: harmony plush
YouTube: Harmony Val
Instagram: Harmony Valarie
Monday, October 28, 2013
Werewolf Plushie Bookmark
Materials:
1) Felt – brown, skin, black, white and pink
2) Needle and threads
3) Ribbon
4) Stuffing
Step1: Cut out the parts.
1) Brown – Head x2
2) Skin – Ears x2, Face x1
3) Black – Eyes x2, Nose x1
4) White – Bones x2
5) Pink – Cheeks x2
Step2: Take one Head piece. Sew on the Face and Ears using felt stitch.
Step3: Sew on the Eyes and Nose using back stitch.
Step 4: Embroidery the Mouth using black thread. Embroidery the Teeth using white thread.
Step5: Back stitch the Head pieces, stuff it as you go along. Before closing, attach the Ribbon.
Step6: Attach the end of ribbon to the Bone and blanket stitch the Bone.
Youtube Video available at http://youtu.be/BaI4ZgkoDLE
Facebook page: Harmony Plushies
Pinterest: www.pinterest.com/harmonyplush
Deviantart: http://harmonyplush.deviantart.com
Youtube Video available at http://youtu.be/BaI4ZgkoDLE
Facebook page: Harmony Plushies
Pinterest: www.pinterest.com/harmonyplush
Deviantart: http://harmonyplush.deviantart.com
How to Make a Totoro Coin Pouch Template
It is an excellent gift and it is easy to make with your own hands... This is the template for the Totoro Coin Pouch.
This is the template, I hope you enjoy making this cute cute Totoro!!!
You can email me for new patterns or new tutorials or suggest contests... anything!
Harmony Plushies (Facebook page)
Thank you for viewing my BlogSpot.
Subscribe to:
Posts (Atom)


.jpg)


